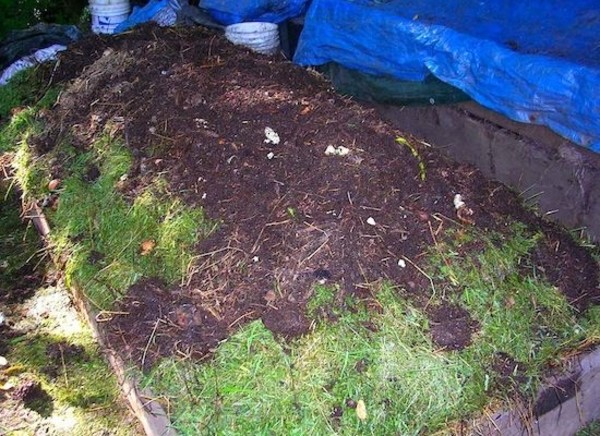
Plant Food for Your Garden: How to Make Layered Compost

Layered composting or aerobic composting is the most efficient, effective and quickest way to turn your garden weeds and grass clippings into rich, nutritious soil for your garden beds. Layered lasagna compost offers a delectable feast for the bugs and bacteria that aerate and nourish a compost pile, acting as industrious decomposition farmers. So close the loop on your garden feeding methods by learning how to build layered compost and create all the fertilizer and planting soil that you will need for a season.
Composting offers a tangible example of a sustainable life-cycle process for any gardener, as the weeds, dead plants and grass clippings from a yard create food for new crops and floral beauties. The presented lasagna layering method allows a compost pile to heat up and break down fibrous matter in a few months. Covering and turning your compost will also speed up the process, meaning that you can attain usable, nutrient-rich soil in a matter of three months. Over the winter most environments don’t produce enough material for active composting, but these environments also do not allow for over-winter gardening. However, composting can be actively done from the spring to the fall – basically as long as you can weed and mow the lawn.
Creating an area for your compost making operation is the first step to a successful end product. The size of the area will depend on the size of your garden and the amount of weeds and grass clippings you can accumulate. You’ll want space for at least 2 compost piles, as well as space to keep your compost makings in between building sessions. The compost piles should have 4-sided, wooden box frames built around them to hold the compost, ideally rectangular boxes that are no longer than 8 feet by 4 feet or square boxes that are 4 feet by 4 feet. Space for three boxes is ideal, as you’ll then be able to turn the pile twice, facilitating a quicker break down process and allowing ample time forthe beneficial bugs to do their finish work.

Its then time to begin gathering your compost makings: weeds from your gardens and flower beds, grass clippings from mowing the lawn and any type of farm animal (chicken, goat, cow, horse, llama, etc.) manure that you may be able to gather. Make sure to start off your layered compost with a 4-inch, dry, carbonaceous layer comprised of corn stalks, shredded leaves or straw. This first layer helps to ensure enough air circulation and avoid a slimy, anaerobic environment on the bottom of the pile. The next layers layer should be made up of grass clippings, then weeds, and finally manure if it’s available. Each of these layers should be 6-8 inches thick, and can be layered several times on top of each other if you have enough material.

Always top off your layered compost with a 6-8 thick layer of grass clippings. Grass clippings are rich in nitrogen, which generates a lot of heat for warming up your pile and speeding up decomposition. Weeds can be stored for a few days in your makings pile in between layer building, but grass clippings are always best if used fresh.

Your pile will take on a pyramid shape as you keep building it, so make sure to create a lengthwise dent in the center at the top of the pile so that steaming moisture from the pile stays in the pile rather than trickling down the sides. Cover your pile with several tarps, making sure that there are as few possible heat escape routes as possible. Lay bricks or large rocks on the top to mark out and hold the shape of your moisture-retaining dent.

You can keep adding to the pile with the same layering method as described above for several weeks after starting it. If you have rough material such as straw or plant stalks, feel free to layer it into the pile a couple of times. After about 3 weeks the pile will be ready to turn into the next compost box. Do this by turning and “slicing” the pile like a loaf of bread, so that all of the matter gets mixed up rather than turning the whole pile on its head. This is very labor intensive but a great workout – especially if you do it with some good tunes on! A second turn in another 3 weeks is ideal if you have a third box, where it can sit for a few more weeks before its ready to dry in the sun and then be sifted for use in your garden.

A few things to note: if your environment is very dry, feel free to water your pile to allow steam creation and help the breakdown process. Adding lime to your compost is a great idea if you are attempting to sweeten acidic soil. Most veggies do better in sweeter soil, whereas berries love acidic soil. Animal dung and urine are tremendously good food for your veggies, but ideally only once they have been broken down and assimilated by bacteria. If you don’t have animals, see if a local farmer or animal keeper can provide you with some barn cleanings for your hot compost pile.
Images: Myrtle Glen Farm

